 In a recent post How to add live chat to your Facebook we described the steps on how to install the live chat tab to a Facebook page. After publishing the article, we received several requests from our users concerning whether it was possible to ask a page like from Facebook visitors before they were allowed to use live support.
Woobox Static HTML application, which we’ve been reviewing in the above mentioned post, does offer this feature. So do some other applications, though we don’t guarantee all of them will.
The feature which allows you to protect your page content from viewing by non-fans is called Fan-Gate. In this post we will show you how to enable it in Woobox. And we will also cover another popular app, Static HTML by Thunderpenny.
Enabling Fan-Gate in Woobox
So you have installed a live chat tab to your Facebook page. Now to turn on Fan-Gate you need take the following steps.
Step 1. Click your live chat tab. You need to be logged into your Facebook as admin.
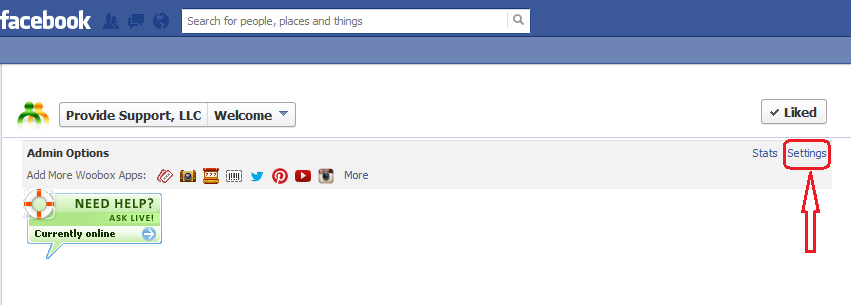
Step 2. On the Woobox screen click Settings link in the top right corner.
Step 3. Enable your preferred Fan-Gate choice. You have 3 options here:
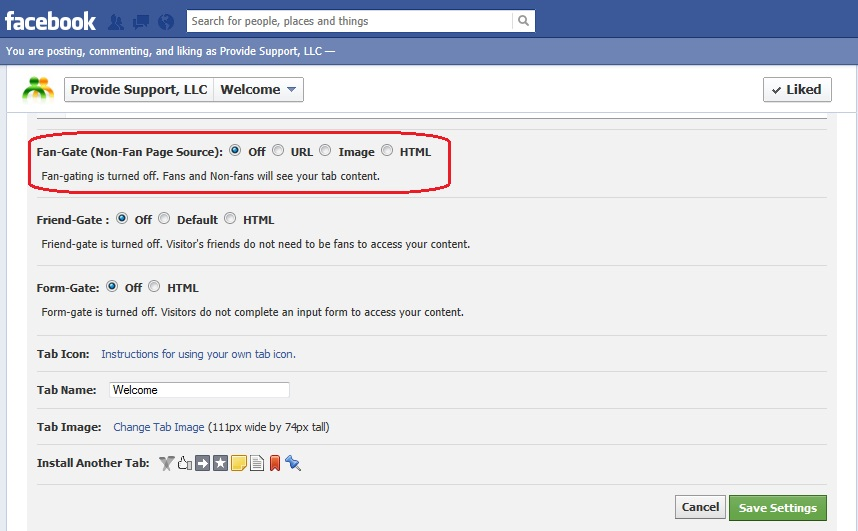
- URL, which allows you to redirect non-fans clicking on your live chat tab to any other page. It could be your website Contacts page, or any other page you can think of, even your Facebook profile main page.
- Image, which allows you to get your message to the customer using an image. For example, you could use a Facebook like me image or any other you may find appropriate.
- HTML – here you can basically design the page you would like your non-fan visitors to see when they click your live chat option. You can add some text here, or images, or mix up both. In a word, you can create a fresh and appealing page and give your reasons why visitors should give you a like, or just display some interesting and useful information about your company on that page. As an example, check out our Live Chat page here (and give us a like if you enjoy it).
Step 4. Save your settings.
Enabling Fan-Gate in ThunderPenny
Once you have added the live chat tab, here is what you do to activate Fan-Gate.
Step 1. Click your live chat tab. Please remember that you need to be logged in as admin. You will see a screen as captured below.
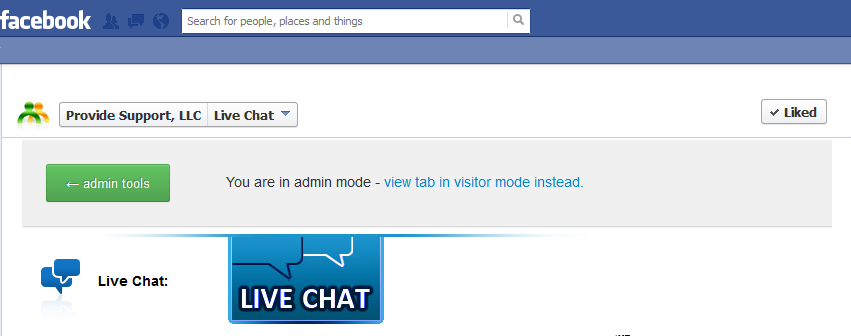
Step 2. Click Admin Tools green button
Step 3. Click over to Fangate tab and check the little box “Enable fangate” right below the menu tab.
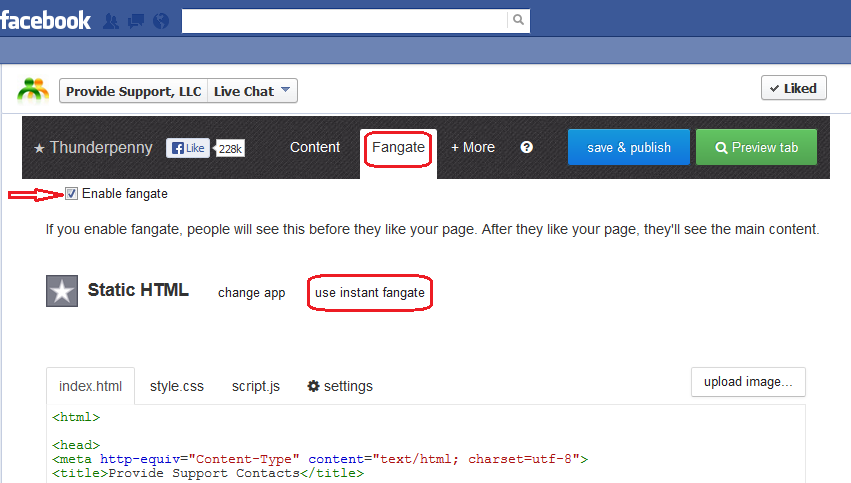
ThunderPenny gives you similar options in terms of what you can show to your non-fan Facebook users. You can add HTML using one of the available applications, or you can upload an image. As a third option they offer Instant Fangate, which is quite interesting. If you click this option, you will see that you can add your own message there and style it to your liking.
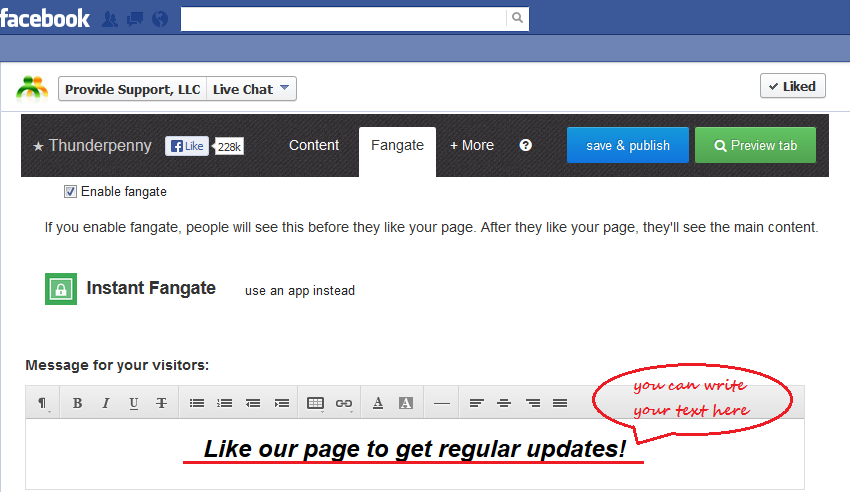
Step 4. Don’t forget to click Save & Publish to ensure fangate is activated.
That’s just about it. It is a very simple, but nontheless useful feature, which many of you can take advantage of and collect more likes for your Facebook page.
Enjoy!
Update: As of November 5, 2014, Facebook no longer allows fangates, so instructions provided on this page are no longer valid. You can use the new leadgate feature instead where customers are presented with a form to fill out before they like your page.
- How Not to Lose Customers in the Busy Holiday Season - December 6, 2018
- The Goals to Set For Your Customer Service Team - October 4, 2018
- Don’t Give Your Customers a Reason To Leave - August 22, 2018
