|
<< Click to Display Table of Contents >> System Setup and Customization > Control Panel > Managing operators and departments > Managing Operators |
General
Agent profile contains all personal information about the agent: name, nick name, email, picture, login and password, list of assigned departments.
You can create any number of agent profiles during the free trial. When you purchase a subscription, the number of agent profiles should be adjusted according to the subscription.
If you wish to have a personalized profile for each agent, you need to have as many agent profiles as there are agents in your company.
You can also create generic agent profiles and share them between several agents.
Each agent can have as many concurrent chats at a time as they can handle, we don't limit this, it will only depend on your agents.
Add / edit / delete agent profile

Add / edit / delete / sort operator profile
Add
To add a new agent, please do the following:
1.Click on "Create New Operator" (1) link in the top left corner of the Operator Profiles table on the Operators and Departments page
2.Fill out all needed fields on the New Operator Profile page (Note! Fields marked with * are required). Please also note! Operator login and Nick Name should be unique. Operator login can contain only Latin letters and digits. Other characters except underscore and dash characters are disallowed. Operator password can have no less than 5 symbols and no more than 20.
3.Press "Create" button at the very bottom of the New Operator Profile page
Edit
To change the agent name / login / password / e-mail / picture (photo) / assigned departments / transcripts sending / alerts, please do the following:
1.Click on "Edit" (2) button (pencil icon) next to the agent info in the Operator Profiles table on the Operators and Departments page
2.Enter new data on the Operator Profile page
3.After entering all updates, press "Save" button at the very bottom of the Operator Profile page
Delete
To delete an agent profile, please do the following:
1.Click on "Delete" (3) button (red cross icon) next to the operator info in the Operator Profiles table on the Operators and Departments page
2.Confirm profile deleting
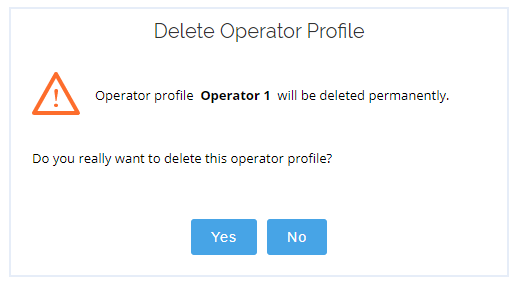
Delete operator profile confirmation
Sorting
If you would like to change the order of your agent profiles in the agents list, you can use green arrows to move profiles or just drag them and drop (4). To change the order of displaying your agent profiles, please do the following:
1.Click green arrow to move the profile up or down on one position
2.Place your mouse cursor over the profile, left click on it, drag it (4) to the needed position and release
Agent picture
Agent picture will be displayed in the top left corner of the chat window in classic chat window and next to the agent's name in modern chat window. You can choose agent picture from our gallery, upload your own picture or completely delete the picture.
The picture should be GIF, PNG or JPEG image up to 512x512 pixels in size. If the uploaded image exceeds the maximum size allowed, it will be scaled to fit the limits. The best image size to fit default header images is 96x96 pixels.
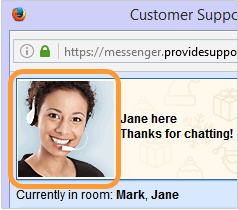
Agent picture in the Classic Chat Window
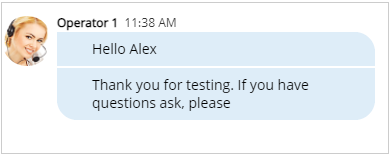
Agent picture in modern embedded chat window
How to add agent picture from the gallery
To select an agent picture from our gallery, please do the following:
1.Start editing the agent profile
2.Click on the existing agent picture or on the "Select Operator Picture from Our Gallery" link
3.Choose needed picture from the gallery and click on it
4.Press "Save" button at the very bottom of the operator profile page
Most part of operator pictures in our gallery are 96x96 pixels in size.
How to upload your own agent picture
To upload your own agent picture, please do the following:
1.Start editing the agent profile
2.Press "Browse..." button in the Operator Picture section of the operator profile
3.Choose needed picture on your computer
4.Press "Save" button at the very bottom of the operator profile page
Note! Please, do not check "Delete existing picture" box if you don't want to completely delete the operator picture.
How to delete agent picture
To completely delete an agent picture, please do the following:
1.Start editing the agent profile
2.Check "Don't use operator picture (uploaded picture will be removed)" box in the Operator Picture section of the operator profile
3.Press "Save" button at the very bottom of the operator profile page

Deleting operator picture
Operator greeting message
Operator greeting message will be displayed to the right from the agent picture in Classic Chat Window. The greeting message supports basic HTML formatting. This greeting message is not displayed in Modern Embedded Chat Window.
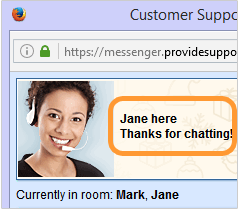
Operator greeting message in Visitor Live Chat Messenger
By default the greeting message for all new agents is "You are speaking<br/>with Customer Service and Technical Support operator"
To change the greeting message, please do the following:
1.Start editing the agent profile
2.Change text in the Greeting Message box, use HTML tags to format the text if needed
3.Click "Save" button at the very bottom of the Operator Profile page to submit changes
Each agent profile can be assigned to as many departments as you need. When you create a new agent profile you have a possibility to select the departments you would like to assign it to. When you create a new department, the list of available agents is available and you can select the agents you would like to assign.
To change the list of departments assigned to the agent, please do the following:
1.Start editing the agent profile
2.Check/Uncheck all needed departments in the Assigned Departments section
3.Click "Save" button at the very bottom of the Operator Profile page to submit changes
Changing agent messages and nick name font
For each agent profile you can set individual nick name and messages font, size, style and color. This setting is available only for Classic Pop up messenger:
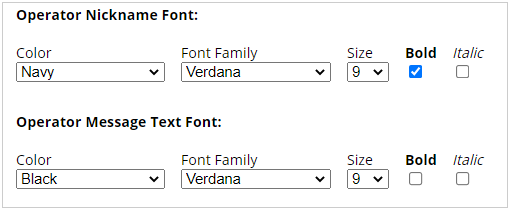
Operator font editing
"Administrator" operator
There are no special administrator agent profiles in our system but there's a workaround: you as the account administrator can login to any agent profile from your computer and see all current chats. You can have several agent apps running on the same computer if needed.
You can see all current visitors if you login as operator and switch your agent app to Away status – for your website visitors it will look as if the chat is offline.