|
<< Click to Display Table of Contents >> System Setup and Customization > Control Panel > Account customization > Visual customization > Post-chat survey window editing |
General
The Post-chat survey window is the screen your visitors see when they close the chat window if the post-chat survey feature is enabled in your account.
If the visitor fills out the survey, its result is attached to the chat transcript sent after the chat has been finished. You can find it at the very bottom of the transcript, in the Post Chat Survey section. If a default survey is used in the account, the results will be processed by the Chat Reporting application.

Post Chat Survey page
Enabling / disabling the post-chat survey
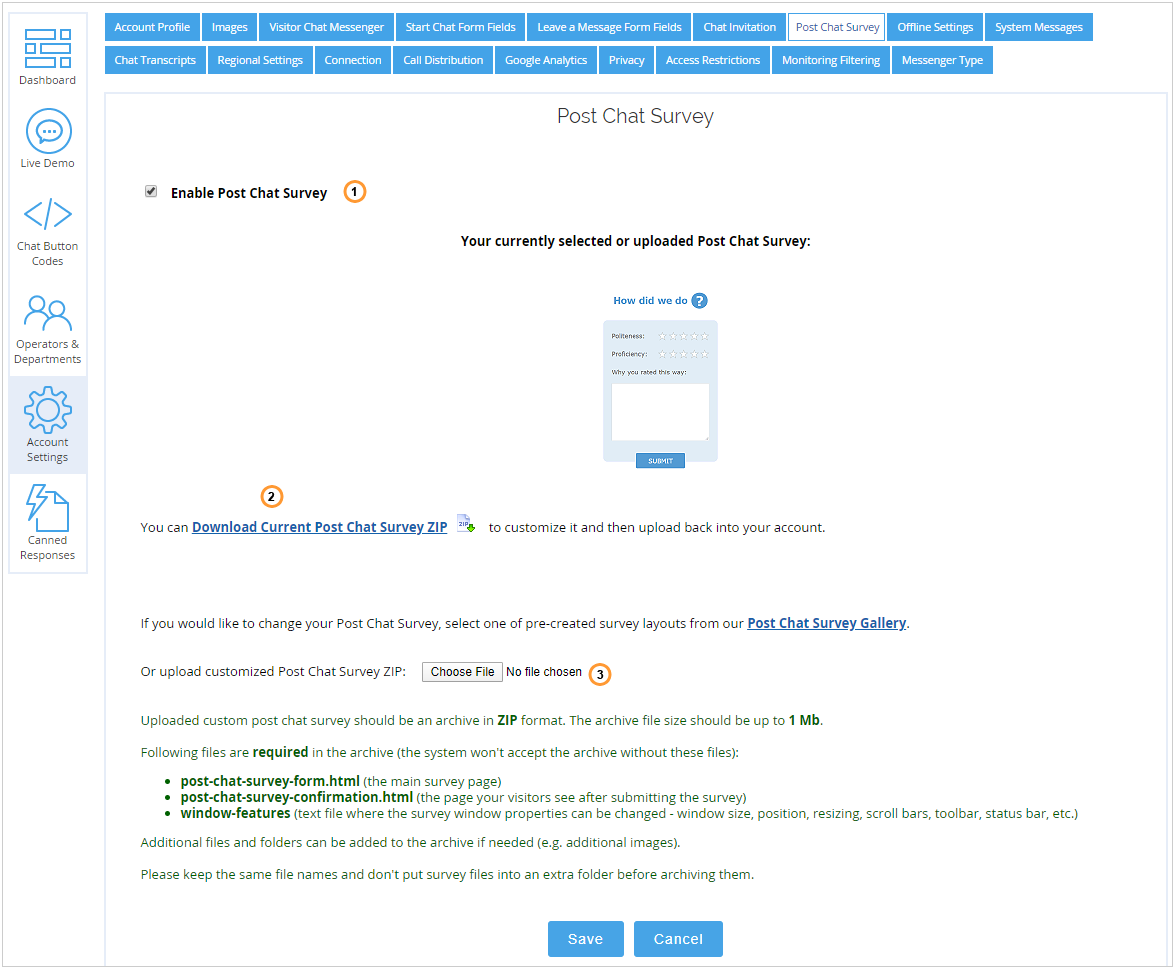
You can enable / disable the post-chat survey in your account Control Panel, Account Settings / Post Chat Survey page using the (1) box.
Predefined survey themes
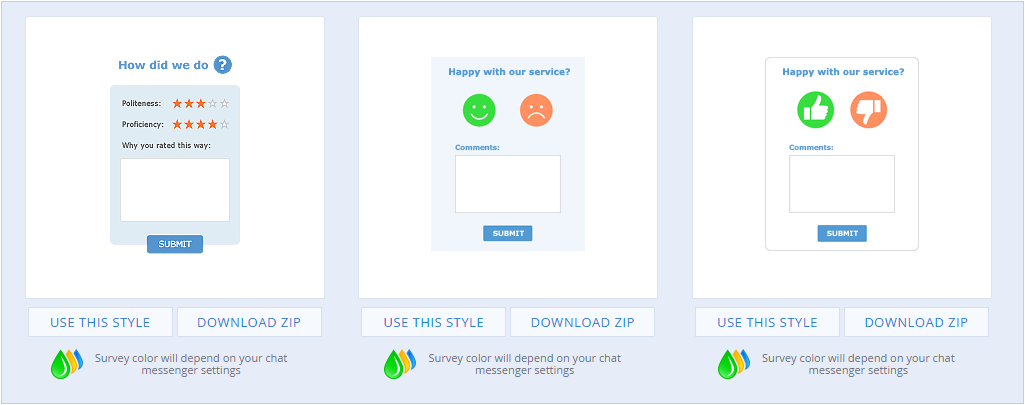
We offer a set of predefined survey themes. These themes are available for modern chat window and the theme's color will depend on chat window color scheme. Each of them contains 3 questions:
•Politeness (from 1 to 5)
•Proficiency (from 1 to 5)
•Comments (text field)

Post Chat Surveys Gallery
To choose one of our themes from the gallery on our website, please do the following:
1.Open Account Settings / Post Chat Survey page in the account Control Panel
2.Click "Post Chat Survey Gallery" link on the page, the survey gallery will open
3.Choose the needed survey theme and pick a color theme for it
4.Click on the survey or click 'Use this Style' button below it
5.Press "Save" button on the Account Settings / Post Chat Survey page
Please note! If you use your customized post chat survey with classic chat window, it will not work if you switch to modern chat window. Before switching to modern chat window, download your post chat survey theme and after switching you would need to edit the survey theme available for modern chat window. You can use HTML content from your old theme and paste it into your new theme.
Survey customization
You can fully customize the survey as it is a simple HTML page. You can add / edit / remove questions, change scale of marks, background, window size etc.
To customize the survey, please do the following:
1.Open Account Settings / Post Chat Survey page in the account Control Panel
2.Download the survey theme you wish to customize
a.from the Post Chat Survey page by clicking "Download Current Post Chat Survey ZIP" link (2). This link can be useful if you've already customized the survey theme and wish to change it once again
b.from our gallery by clicking "Post Chat Survey Gallery" link on the page
3.Extract the survey files from the archive
4.Edit all needed files
5.Archive files back
6.Upload (3) the archive to your account Control Panel, Account Settings / Post Chat Survey page
Please note the following!
•Keep the same file names and the folder structure
•Don't delete any files from the archive even if they are not used
How to change the questionnaire
All questions, scales of marks, marks' titles, etc. are specified on the main survey page post-chat-survey-form.html. You need to change its source HTML code if you wish to customize the questionnaire.
Example of adding another rating to the survey:
You need to add another DIV to the following section:
<div class="row-rating vertical-align-wrapper">
<div class="rating-label vertical-align">Politeness:</div>
<div class="rating-box" id="Politeness">
<input id="rating1-5" type="radio" name="Politeness" value="5">
<label for="rating1-5">5</label>
<input id="rating1-4" type="radio" name="Politeness" value="4">
<label for="rating1-4">4</label>
<input id="rating1-3" type="radio" name="Politeness" value="3">
<label for="rating1-3">3</label>
<input id="rating1-2" type="radio" name="Politeness" value="2">
<label for="rating1-2">2</label>
<input id="rating1-1" type="radio" name="Politeness" value="1">
<label for="rating1-1">1</label>
</div>
</div>
<div class="row-rating vertical-align-wrapper">
<div class="rating-label vertical-align">Proficiency:</div>
<div class="rating-box" id="Proficiency">
<input id="rating2-5" type="radio" name="Proficiency" value="5">
<label for="rating2-5">5</label>
<input id="rating2-4" type="radio" name="Proficiency" value="4">
<label for="rating2-4">4</label>
<input id="rating2-3" type="radio" name="Proficiency" value="3">
<label for="rating2-3">3</label>
<input id="rating2-2" type="radio" name="Proficiency" value="2">
<label for="rating2-2">2</label>
<input id="rating2-1" type="radio" name="Proficiency" value="1">
<label for="rating2-1">1</label>
</div>
</div>
To add another rating you need to:
1.Change title in "rating-label" DIV
2.Change ID in "rating-box" DIV
3.Change input title
<div class="row-rating vertical-align-wrapper">
<div class="rating-label vertical-align">Speed of solving my issue:</div>
<div class="rating-box" id="Speed">
<input id="rating3-5" type="radio" name="Speed" value="5">
<label for="rating3-5">5</label>
<input id="rating3-4" type="radio" name="Speed" value="4">
<label for="rating3-4">4</label>
<input id="rating3-3" type="radio" name="Speed" value="3">
<label for="rating3-3">3</label>
<input id="rating3-2" type="radio" name="Speed" value="2">
<label for="rating3-2">2</label>
<input id="rating3-1" type="radio" name="Speed" value="1">
<label for="rating3-1">1</label>
</div>
</div>
To translate the post-chat survey you need to translate all needed texts in post-chat-survey-confirmation.html and post-chat-survey-form.html files.
Possible errors
Lost files or invalid archive structure
The correct survey archive structure is the following
•post-chat-survey-confirmation.html (the page your visitors see after submitting the survey)
•post-chat-survey-form.html (the main survey page)
•post-chat-survey-script.js (Javascript file for the survey)
•thumbnail.png (predefined survey theme screenshot)
•window-features (text file where the survey window properties can be changed - window size, position, resizing, scroll bars, toolbar, status bar etc.)
•CSS folder (folder with survey styles)
•Images folder (folder with survey images)
The system checks the archive structure when you upload it to the account. If the system cannot find required files, you'll receive the following error message

Required file not found in the survey
This occurs when:
•The required file was removed from the survey or renamed
•The survey folder structure was changed and the required file cannot be found, e.g. an extra nesting level was added to the archive structure
Invalid file type
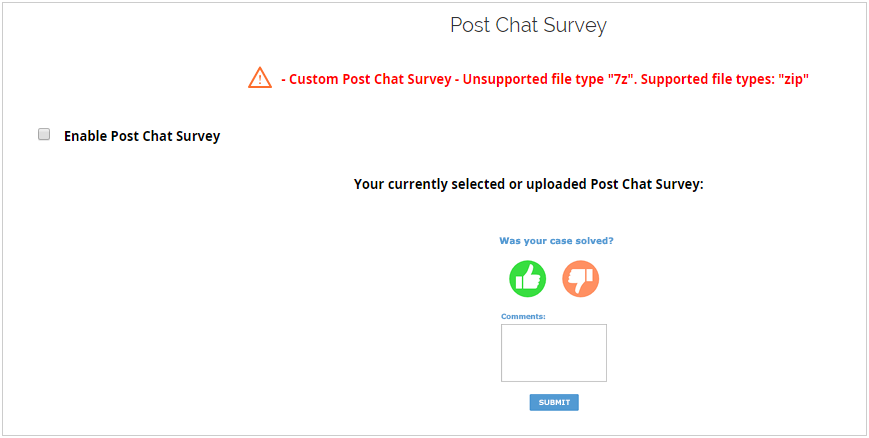
The system accepts only ZIP archives as surveys. If you try to upload some other file, you'll receive the following message

Attempt to upload a file of unsupported type
File too long
Maximum allowed file size for post chat survey archive is 65 KB (65536 bytes). Longer files are not accepted by the system.

Attempt to upload a file larger than 65 KB